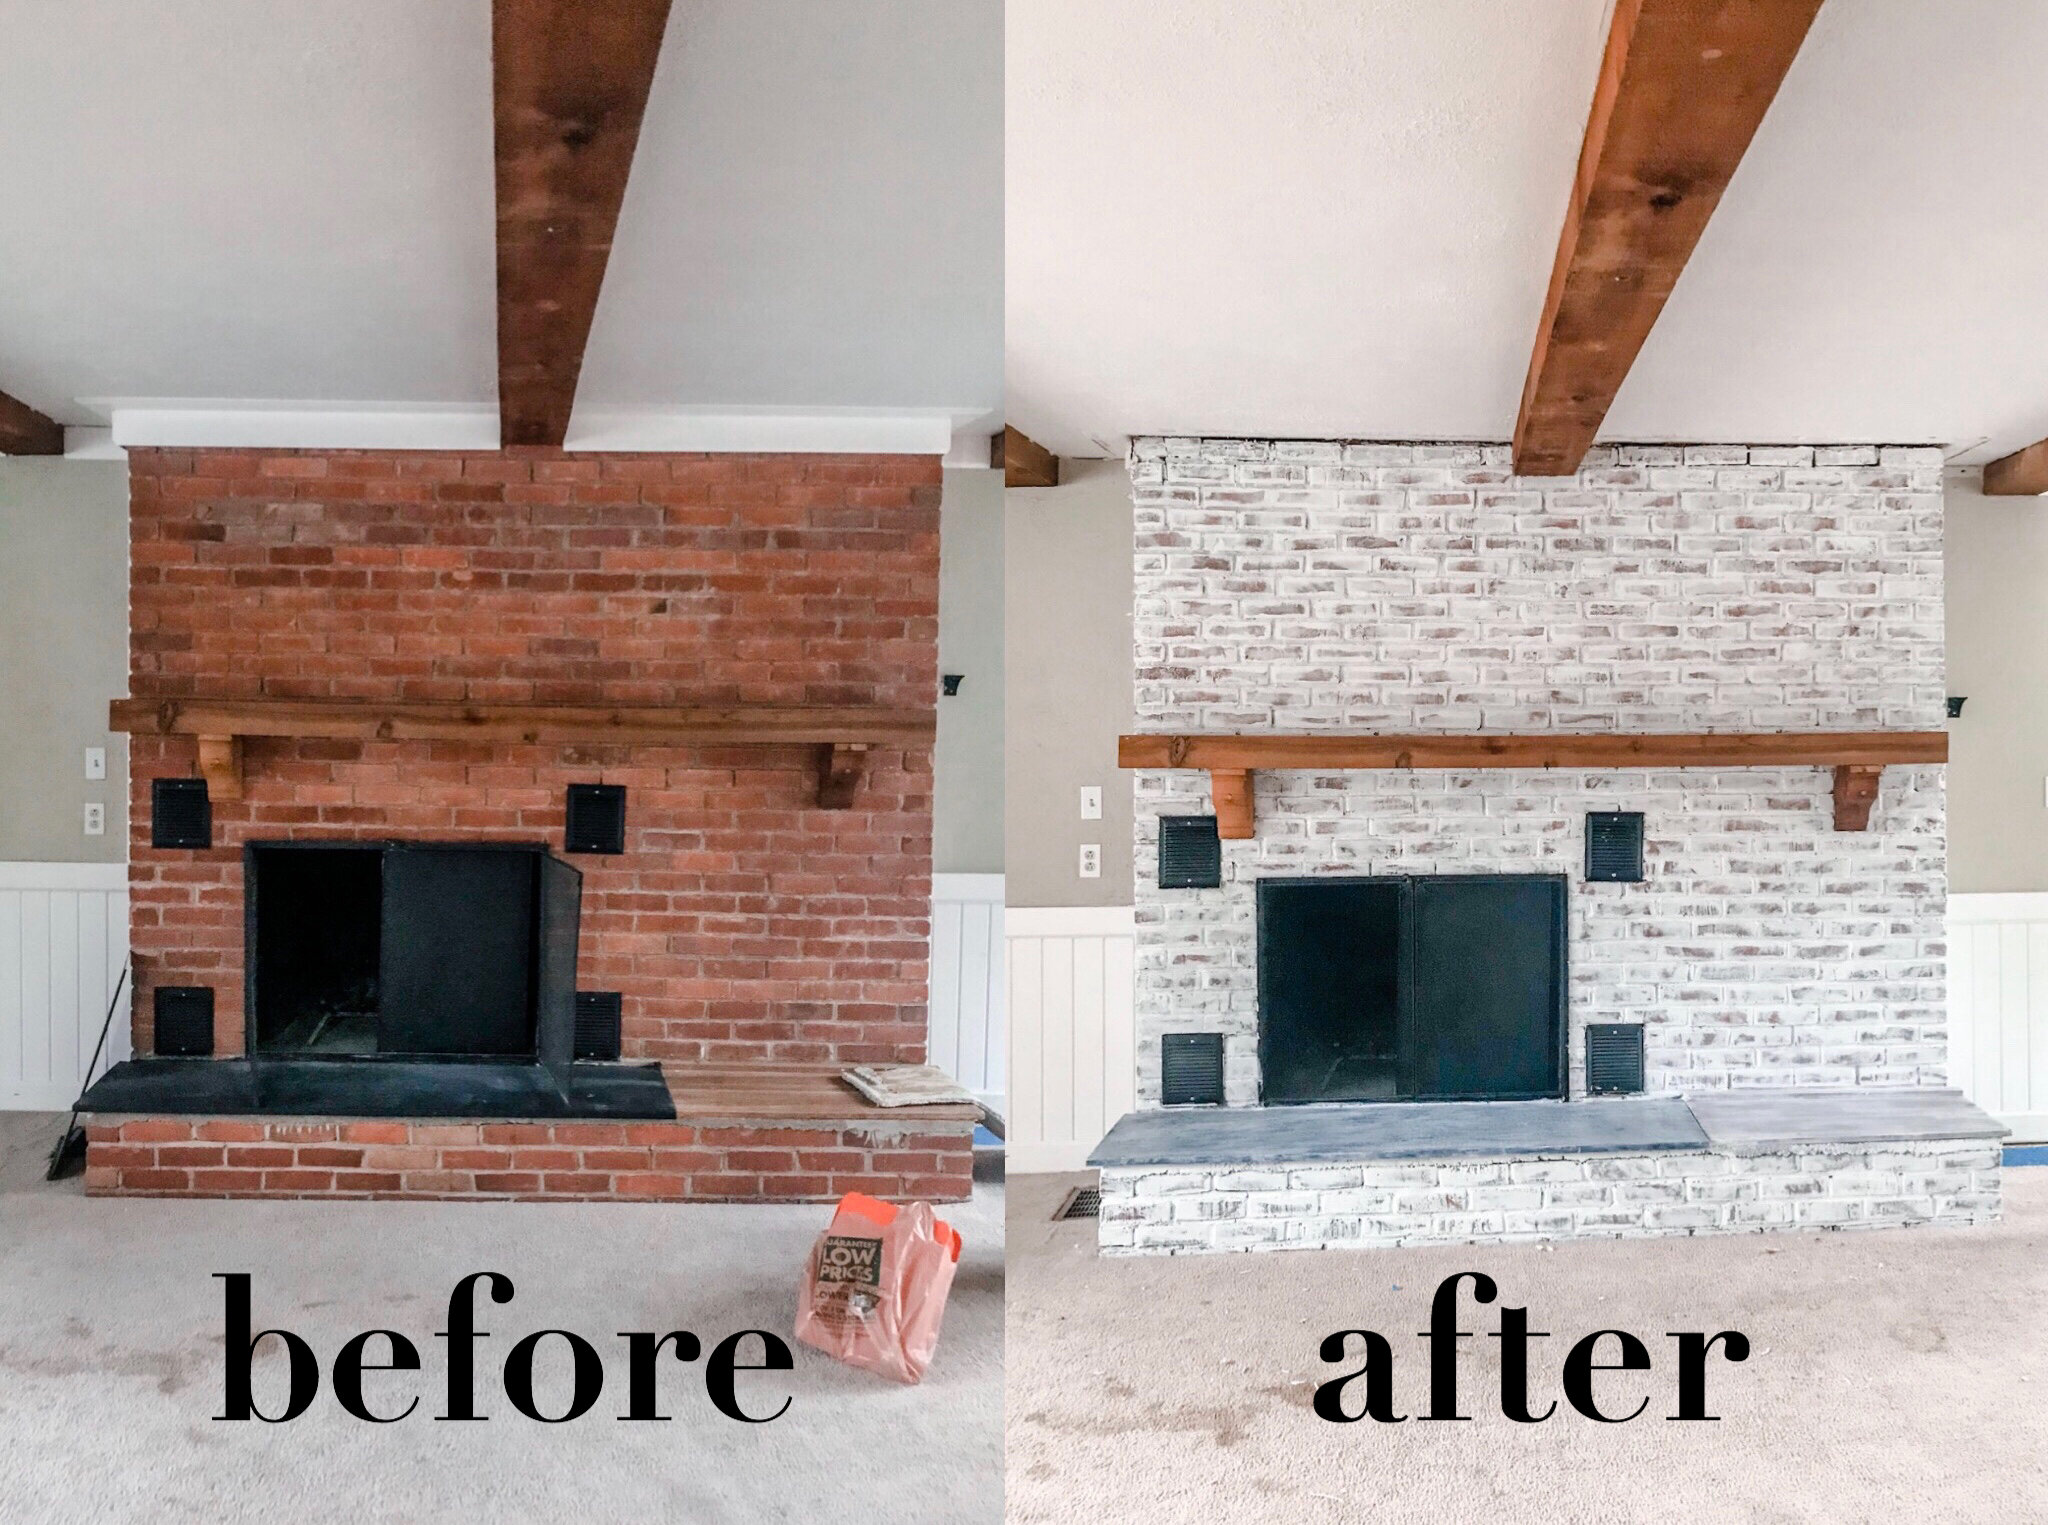
Love your fireplace, but wanting to do a complete rehaul without all of the expense of hiring someone? I did exactly that through this technique and I’m going to teach you exactly how to German Schmear! This gives you a quick updated fireplace for about $50 instead of spending money on expensive stone work. My main goals were to keep the beauty of the brick without fully covering it (like whitewash will typically do) and brighten the room up, making it look fresh and modern, but still cozy. You see my dilemma. I want fresh and modern and bright but still cozy… that’s hard to achieve, but German Schmear gave me that exact vibe! See how our fireplaces fit into our minimal farmhouse decor here!

When we bought our house 2 years ago, it was a total gut job. I mean, the carpet was filthy, we tore down walls, the doors had huge holes in them and the house just felt so dark. I love the light and bright look and if you’ve been following me for long, you know that natural light is so important. It’s super important as a natural mood booster too! When we walked into this house, I fell in love with the wood beams. I loved the big windows and bay window, but I hated how dark everything felt despite those things. It was time for a rehaul. Anything dark was getting painted and I started with this updated fireplace by using the German Schmear technique I’m going to share with you.

Supplies List
- Satin Wall Paint from Sherwin Williams
- Paint Brush
- Paint Cup
- Plastic Drop Cloth
- Painter’s Tape
- Vacuum
- Cleaning Cloth with Water
Before you get started actually painting, you need to decide on the exact look you want. Do you want more white or less white? More brick showing through or less? This will determine how much paint you use and how bright the end look is. I went with a bit of a “middle of the road” level of coverage for my fireplace in the living room (pictured) and a little heavier coverage for the master bedroom fireplace.

How to German Schmear Your Brick Fireplace
It took 6 easy steps to achieve this look:
- Use a broom or vacuum to clean the brick of existing debris.
- Place a drop cloth all around the fireplace;
- Stick painter’s tape all around the mantel, opening, floor and trim;
- Dip the paint brush into the paint and run it over all of the mortar surrounding a brick as well as any low spots (you can be as messy as you would like, the point is to fill all of the cracks);
- Take the paint brush and smear it from the mortar to the face of the brick (tip: side to side swipes make it look genuine and doesn’t show clear brush strokes);
- Repeat all of these steps until the fireplace is completely covered!
If you want it to be more white, just add more paint. But you cannot take off paint, so make sure you start slow. After I completed mine, I also stepped back and you can see where some bricks stand out too much or didn’t catch enough paint and I went back to fill those in a bit more. It’s all up to your discretion and how you want it to look because this how to German Schmear tutorial is customizable!

Helpful Tips to Achieve the Perfect Updated Fireplace
* Nothing needs to be uniform. Having each brick look a little different gives depth.
* I advise using less paint and adding more if you want a darker look (you can’t take away the paint once it’s on).

I hope my How to German Schmear tutorial was helpful and totally changed the look of your home. I LOVE how this turned out, and it is a joy to decorate at every season change.
Where to Next?
- Protect Your Home from Harmful EMFs
- 14 Things I Learned While Completely Renovating My Home
- 50 Gender Neutral Nursery Ideas


One Comment
Pingback: